Tuesday 12 August 2014
Help for Programmers: Run both ASP.Net & PHP simultaneously on IIS serve...
Help for Programmers: Run both ASP.Net & PHP simultaneously on IIS serve...: Most of the developers who usually develop both ASP.net and PHP web applications are facing the following problems. How to Setup IIS...
Thursday 20 March 2014
Add Datepicker in Asp.net
First download Ajax toolkit
use this one
AjaxControlToolkit-Framework3.5SP1-DllOnly.zip
from this link
http://ajaxcontroltoolkit.codeplex.com/releases/view/65800
Unzip that file
The next step is to add the Ajax Control Toolkit to the Visual Studio Toolbox. Follow these steps:
Next, change the ID of the TextBox control to txtStartDate. You can change the ID in the Properties window. The resulting source code looks like this:
The following TextBox illustrates how the CalendarExtender works. Click or tab into the TextBox and the popup calendar will appear:
use this one
AjaxControlToolkit-Framework3.5SP1-DllOnly.zip
from this link
http://ajaxcontroltoolkit.codeplex.com/releases/view/65800
Unzip that file
The next step is to add the Ajax Control Toolkit to the Visual Studio Toolbox. Follow these steps:
- Launch Visual Studio and create a new ASP.NET Web Forms project or website. Open Default.aspx in the Visual Studio editor.
- Create a new Toolbox tab by right-clicking the Toolbox and selecting Add Tab. Name the new tab Ajax Control Toolkit.
- Right-click beneath the new tab and select the menu option Choose Items... Click the Browse button and browse to the folder where you extracted the Ajax Control Toolkit. Pick the AjaxControlToolkit.dll and click the OK button to close the Choose Toolbox Items dialog.
Add a ToolkitScriptManager
Before you can use any of the Ajax Control Toolkit controls in a page, you first need to add a ToolkitScriptManager to the page. You can drag the ToolkitScriptManager from the Visual Studio Toolbox window onto the page. The ToolkitScriptManager is located in the Ajax Control Toolkit tab under the Toolbox.- <asp:ToolkitScriptManager ID="ToolkitScriptManager1" runat="server">
- </asp:ToolkitScriptManager>
Add a TextBox Control
The CalendarExtender works with a standard ASP.NET TextBox control. In Design view, drag a TextBox control from under the Standard tab in the Toolbox onto your page.Next, change the ID of the TextBox control to txtStartDate. You can change the ID in the Properties window. The resulting source code looks like this:
- <asp:ToolkitScriptManager ID="ToolkitScriptManager1" runat="server">
- </asp:ToolkitScriptManager>
- <asp:TextBox ID="txtStartDate" runat="server"></asp:TextBox>
Add a CalendarExtender
The next step is to apply a CalendarExtender control to the TextBox. Add the following CalendarExtender control to your page:- <asp:ToolkitScriptManager ID="ToolkitScriptManager1" runat="server">
- </asp:ToolkitScriptManager>
- <asp:TextBox ID="txtStartDate" runat="server"></asp:TextBox>
- <asp:CalendarExtender
- ID="CalendarExtender1"
- TargetControlID="txtStartDate"
- runat="server" />
The following TextBox illustrates how the CalendarExtender works. Click or tab into the TextBox and the popup calendar will appear:
Wednesday 12 February 2014
Display line numbers in .NET Code Editor
.NET Tips,Display line numbers in code editor, display line numbers in VS .NET IDE
We can display the line numbers in the Visual studio .NET code editor.
In the VS.NET IDE ,
Click TOOLS > OPTIONS
Expand TEXT EDITOR (in left window)
Select Basic > Editor
You will find the Line Numbers Option Under Interaction Group box.
Check Line Numbers option
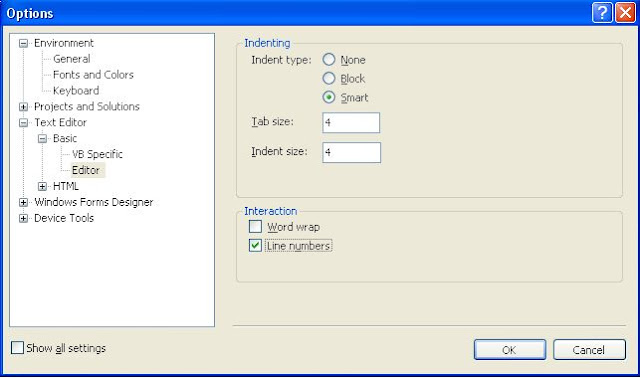
Click OK
We can display the line numbers in the Visual studio .NET code editor.
In the VS.NET IDE ,
Click TOOLS > OPTIONS
Expand TEXT EDITOR (in left window)
Select Basic > Editor
You will find the Line Numbers Option Under Interaction Group box.
Check Line Numbers option
Click OK
Wednesday 20 November 2013
How to Fetch Data from SQl Server to Excel 2007 Without Code
How to Fetch Data from SQl Server to Excel 2007 Without Code
Step1 : First You have to make a DataBase and Table in Sql Server.
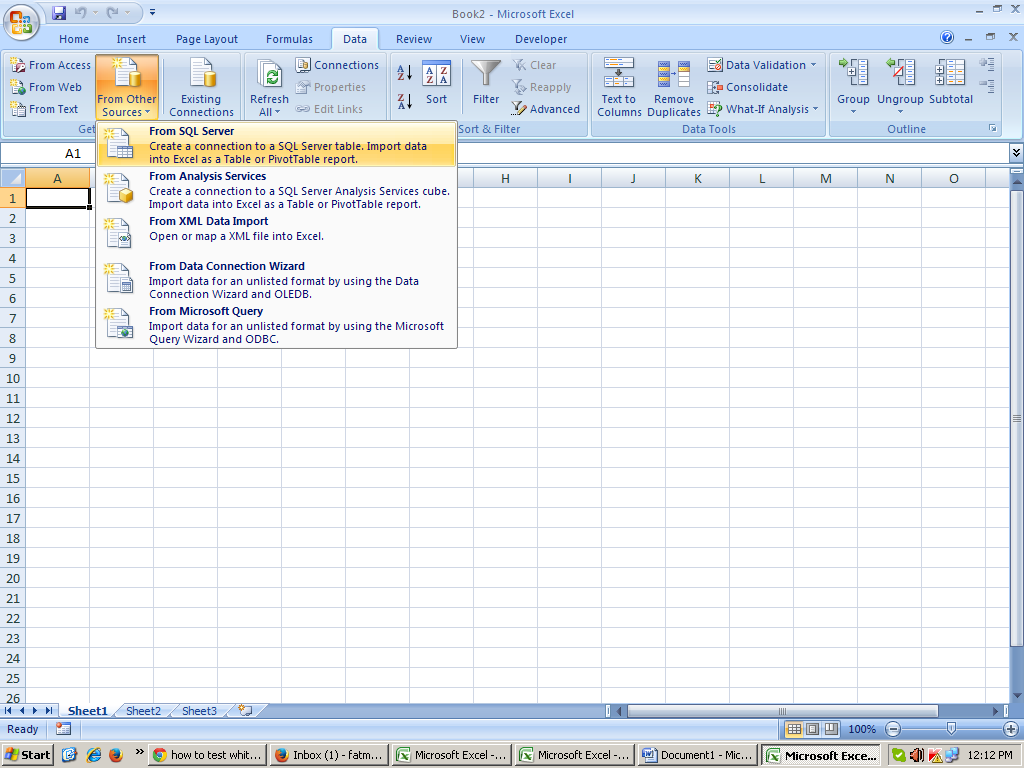
Step2: Open Excel where you want to Fetch the data go to Data tab from menu bar in External Data tab
select from Sql Server
select from Sql Server
Step3: give server name with comma (,) 1433 it is the sql server port no.

Step 4: After next Select Data Base and table.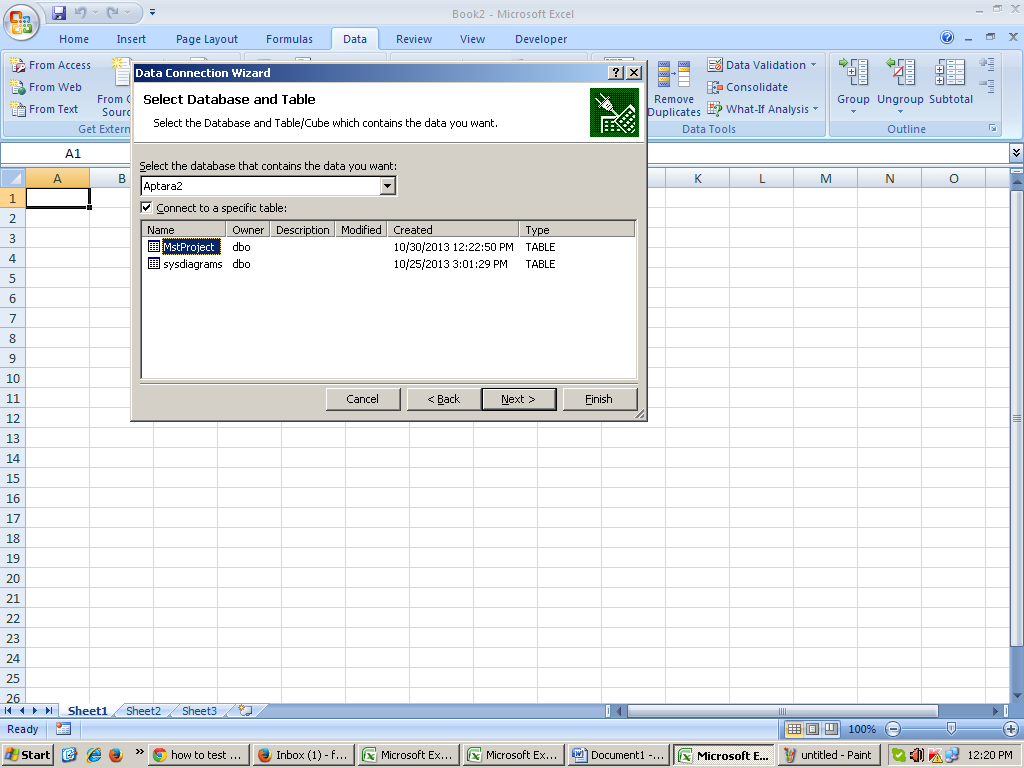
Step 5: Then Next Then select the starting Cell then ok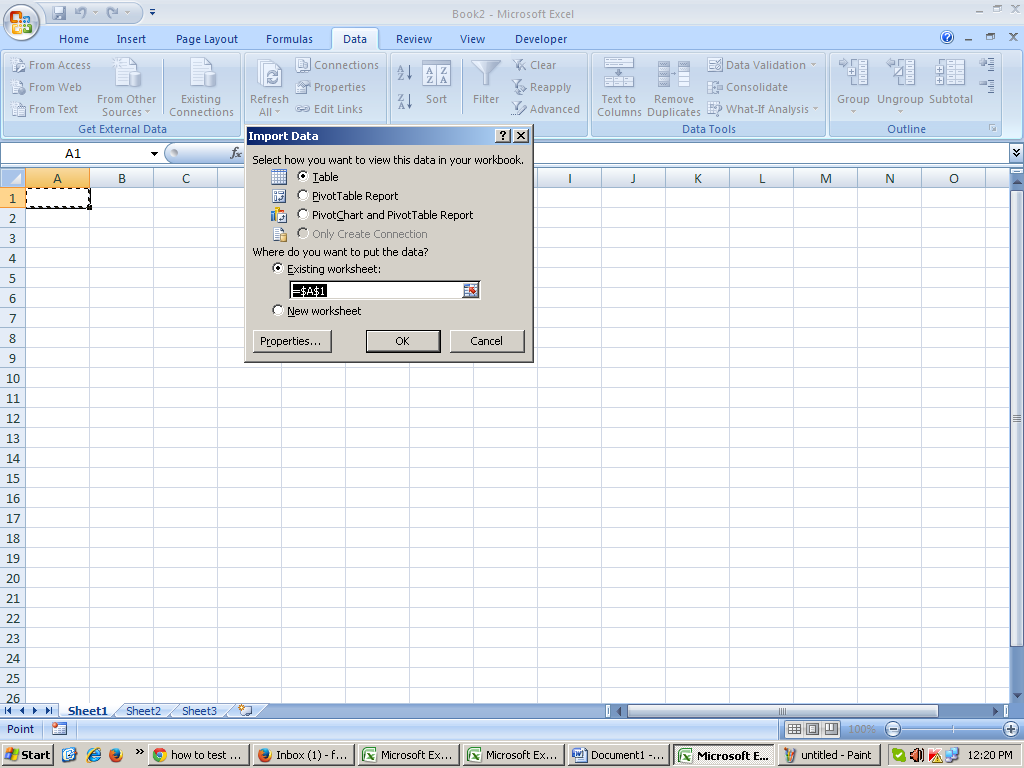
Click Ok …..:)
Monday 18 November 2013
Create a Setup in Visual Studio
Step to make Setup of Project in Visual Studio.
1.
From file menu new Project select Setup and Deployemnet
Step2 :
Right click on setup view File 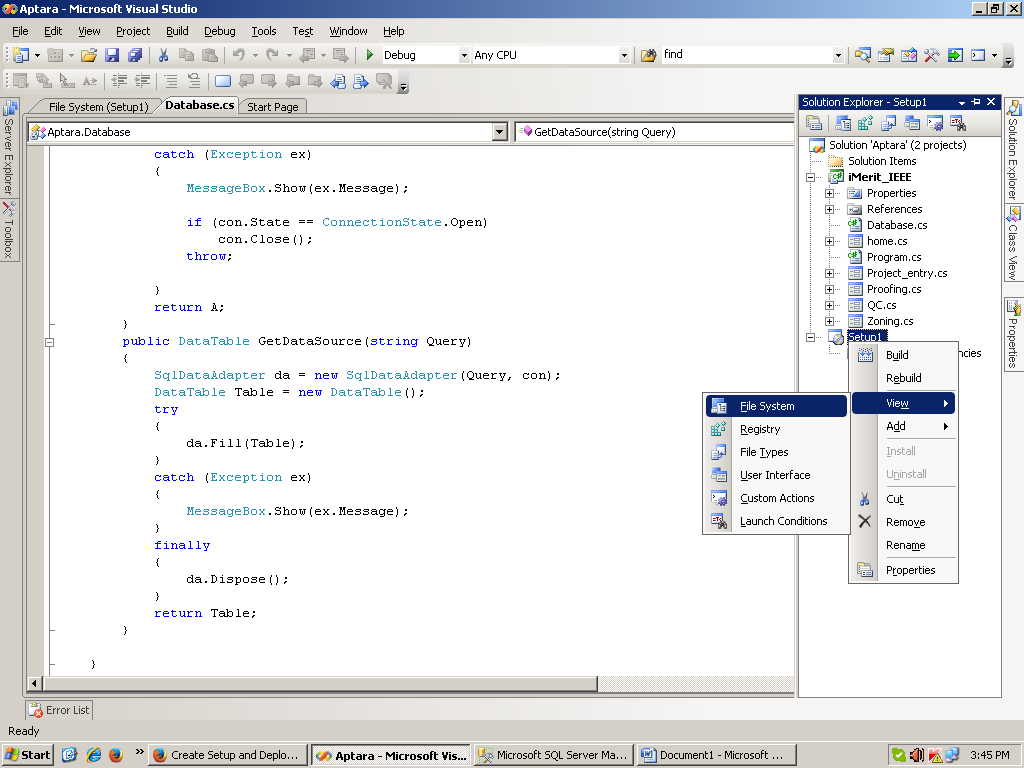
Step 3
Right click Application Folder Add project Output
Step 4 in Project Output you can add file or document file xml file 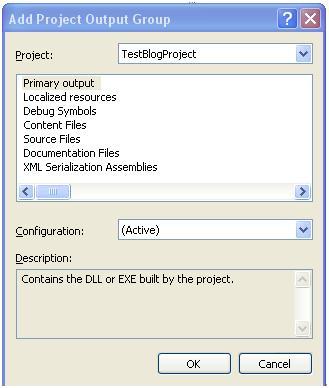
Click Ok
Merely add one or more of the files that is vital for your application by clicking on File…. Now that you have you files in place. Solution Explore /Setup /Detected Depences /primary Output
Step 5
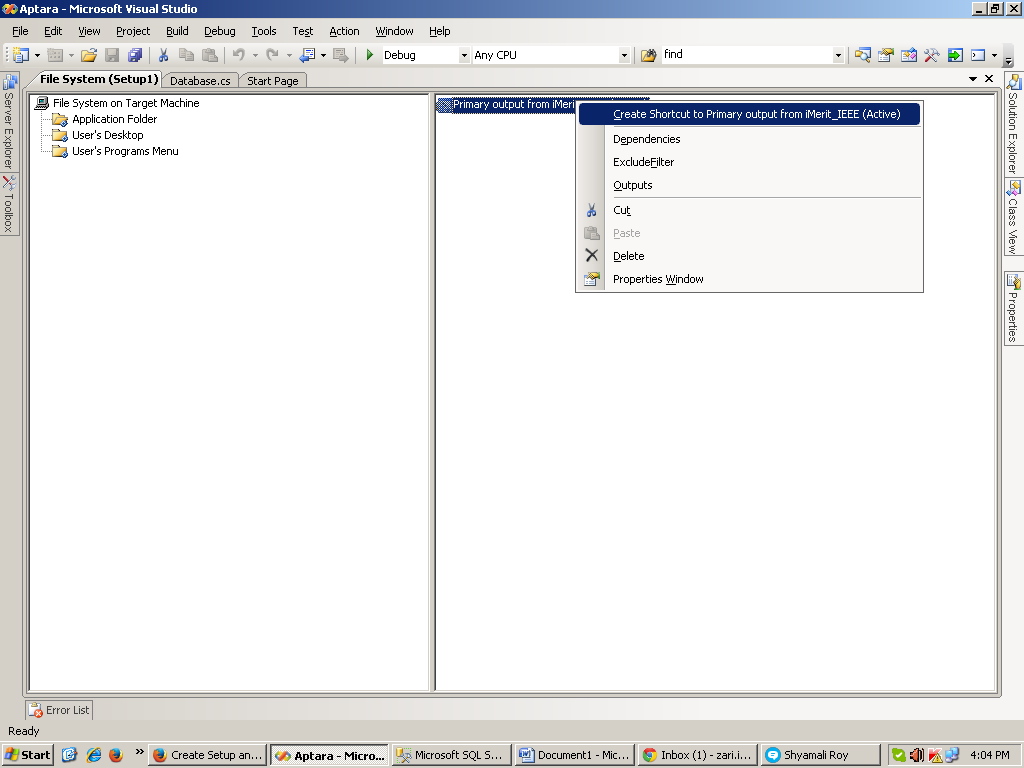
Now to Create Shortcut
Right Click on primary Out Select first Option
To Assign icon Select Shortcut which you create right Click Property Window
Select icon option browse icon select .ico file from you machine if you don’t have ico file then first create that file drag and drop Shortcut into users’s Dekstop Folder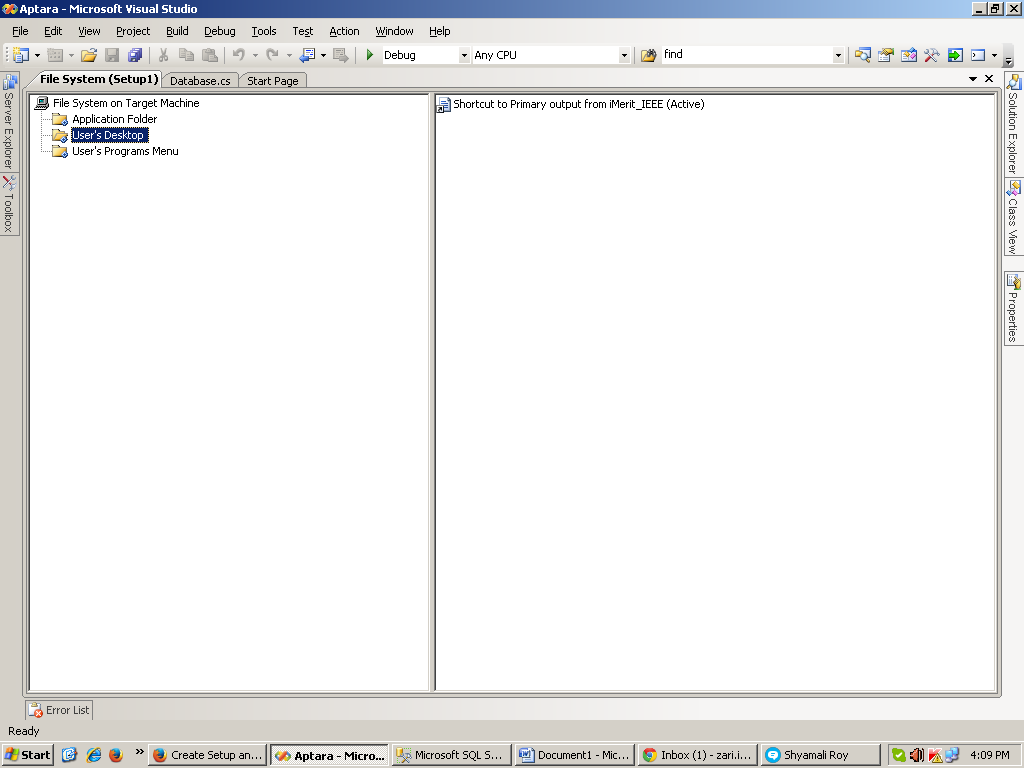
The next item you find of immense importance is the User Interface Editor. Inside of this editor you may eliminate or include dialogs that are needed for this install project.
Right Click Setup view user interface right click Add diolog
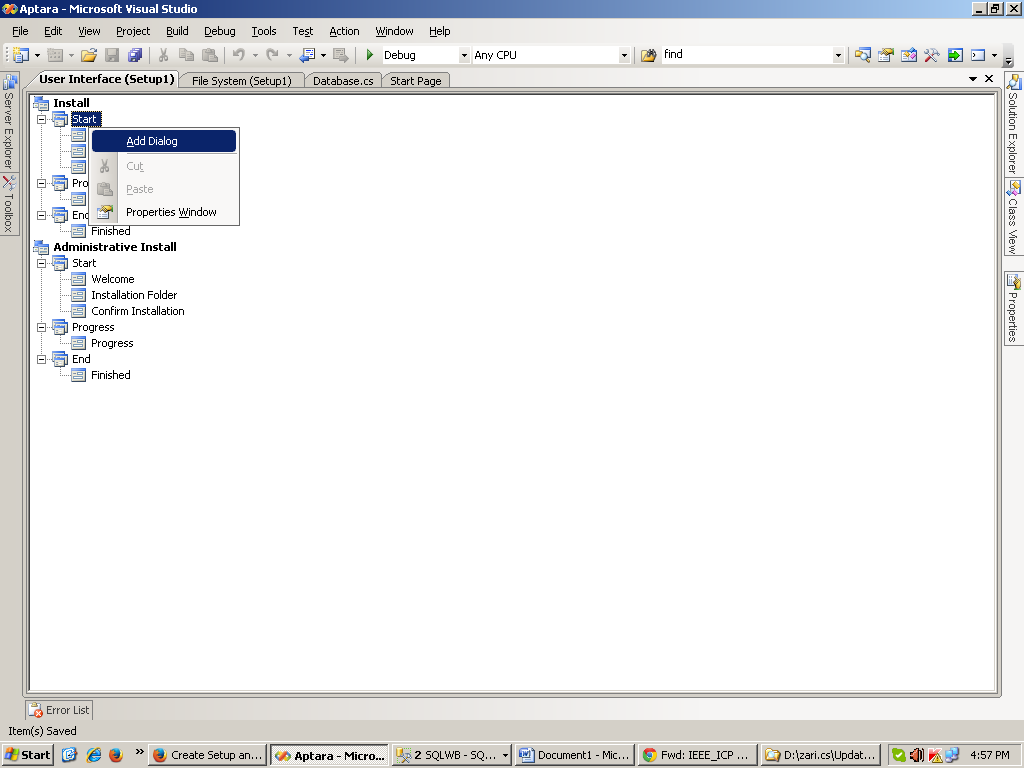
Then Select customer information ok

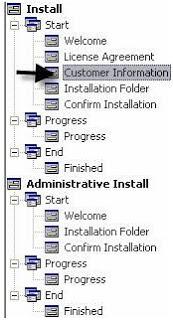
The following screenshot is the default User Interface that is created when I initially created this setup project The only variation is that I have added a Customer Information dialog.
Prerequisites Installation in Windows Installer
Most applications have prerequisites: Components such as the .NET Framework runtime must be available on a target computer in order for the application to run. The deployment tools in Visual Studio include the capability to automatically detect the existence of components during installation and install a predetermined set of prerequisites — a process known as bootstrapping.
Most applications have prerequisites: Components such as the .NET Framework runtime must be available on a target computer in order for the application to run. The deployment tools in Visual Studio include the capability to automatically detect the existence of components during installation and install a predetermined set of prerequisites — a process known as bootstrapping.
To choose which prerequisites to install
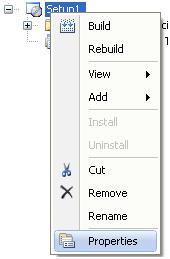
- In Solution Explorer, select the deployment project and Right Click
- Click Properties.
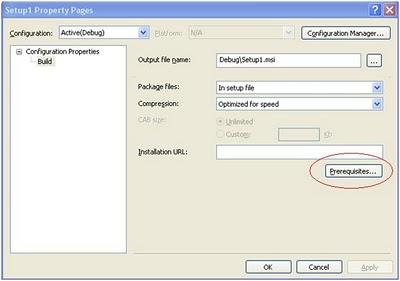
- In the Property Pages dialog box, expand the Configuration Properties node, and then select the Build property page.
- Click the Prerequisites button.
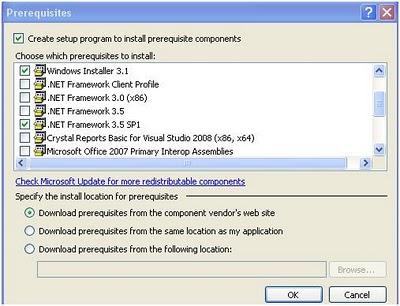
- In the Prerequisites dialog box, make sure that the Create setup program to install prerequisite components box is checked.
- In the Choose which prerequisites to install list, check the prerequisites that you wish to install, and then click OK.
To specify the download location for prerequisites
- In Solution Explorer, select the deployment project, right click.
- Click Properties.
- In the Property Pages dialog box, expand the Configuration Properties node, and then select the Build property page.
- Click the Prerequisites button.
In the Prerequisites dialog box, choose a location:
- If you want to deploy the installers for the prerequisites to a vendor, click Download prerequisites from the component vendor's web site.
- If you want to deploy the installers for the prerequisites to the same location as your application installer, click Download prerequisites from the same location as my application.
- If you want to deploy the installers for the prerequisites to a different location, click Download
- Click OK to continue.
Out put File name This will indicate where your setup or Exe file will build…..
Final : Now Build the Setup
Friday 16 August 2013
Show All Forms In Project in vb.net
This code it will display all the forms in the project just create a form and insert listbox and a button and in click event of button write this code
Dim MyAssembly As System.Reflection.Assembly = System.Reflection.Assembly.GetExecutingAssembly()
Dim type As Type() = MyAssembly.GetTypes()
For Each myType In type
If myType.BaseType.FullName = "System.Windows.Forms.Form" Then
ListBox1.Items.Add(myType.Name)
End If
Next
Dim MyAssembly As System.Reflection.Assembly = System.Reflection.Assembly.GetExecutingAssembly()
Dim type As Type() = MyAssembly.GetTypes()
For Each myType In type
If myType.BaseType.FullName = "System.Windows.Forms.Form" Then
ListBox1.Items.Add(myType.Name)
End If
Next
Tuesday 23 July 2013
Upload image in picturebox using vb.net
Private Sub btnUpload_Click(ByVal sender As System.Object, ByVal e As System.EventArgs) Handles btnUpload.Click
Try
Dim file As New OpenFileDialog()
file.Filter = "Image FilesImage Files(*.jpg; *.jpeg; *.gif; *.bmp)|*.jpg; *.jpeg; *.gif; *.bmp" 'you can 'ad more extension
If (file.ShowDialog() = DialogResult.OK) Then
Dim filename As String = System.IO.Path.GetFullPath(file.FileName)
picBox.Image = New Bitmap(file.FileName)
Me.picBox.SizeMode = PictureBoxSizeMode.StretchImage
End If
Catch ex As Exception
End Try
End Sub
Subscribe to:
Posts (Atom)